Excel is a widely-used spreadsheet software that allows users to store, organize, and analyze data. One of the important features in Excel is the ability to create charts, which are visual representations of data that can make it easier to understand trends and patterns. However, when it comes to printing charts in Excel, users may encounter some issues in terms of formatting and page size. This article will guide you on how to print a chart in Excel full page without losing any data.
1. How To Print Chart In Excel Full Page Steps.
1.1 Step 1: Select the Chart.
- Firstly, you need to select the chart that you want to print.
- Click on the chart to activate it, and then go to the Chart Tools —> Chart Design tab on the ribbon.
- The Chart Tools —> Chart Design tab on the ribbon will appear only when you select to focus the chart object.
- Click the Add Chart Element drop down button in the Chart Layouts group.
- Here, you will find various options such as “Chart Title”, “Axis Titles”, and “Legend” in the drop down list.
- You can use these options to customize the appearance of your chart.
1.2 Step 2: Adjust the Size of the Chart.
- Next, you need to adjust the size of your chart so that it fits the entire page.
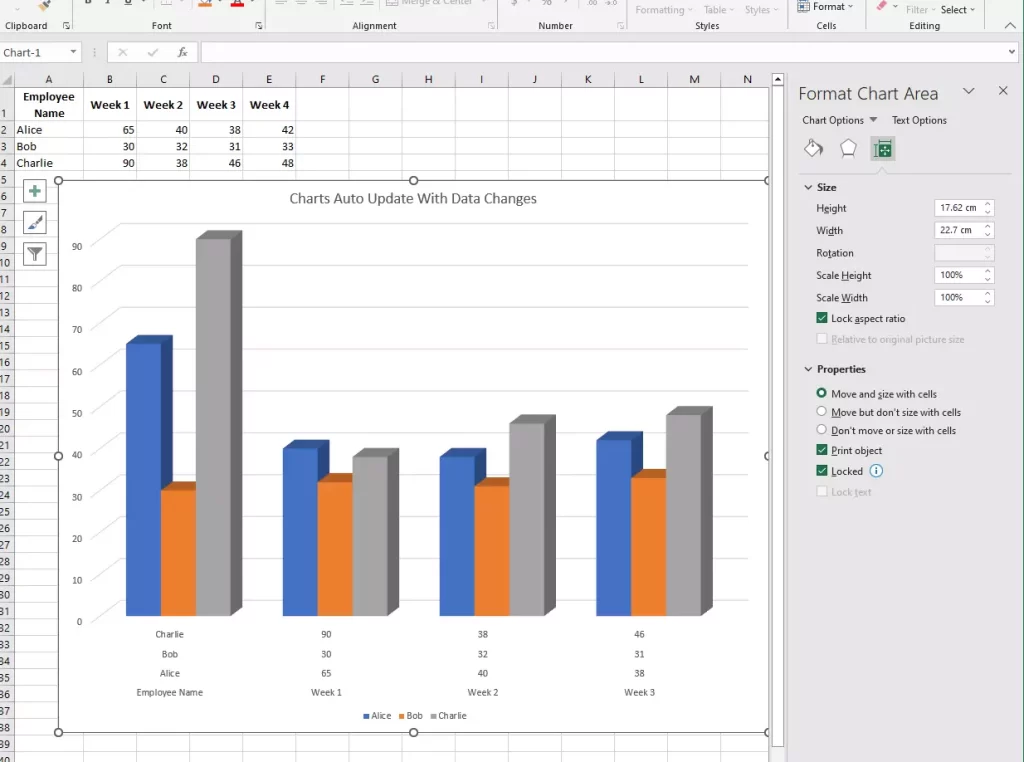
- To do this, right-click on the chart and select “Format Chart Area” menu item in the popup menu list.
- Then it will show the Format Chart Area pane on excel right side.
- In the “Format Chart Area”pane, go to the “Size & Properties” tab ( the third tab ) and set the height and width of the chart to match the size of the paper that you will be using for printing.
- You can also choose other options such as Lock aspect ratio, Scale by percentage depending on your preference.
1.3 Step 3: Set the Print Area.
- After adjusting the size of your chart, you need to set the print area.
- If you just want to print the chart in your paper, you can just select it.
- If you want to print the specified area of the worksheet on the paper, you can follow the below steps.
- Select the cell range in the area on the worksheet that you want to print, the cell range should contain the chart that you want to print.
- Go to the “Page Layout” tab on the ribbon, and then click on “Print Area” in the Page Setup group.
- Here, you can select “Set Print Area” to define the area that you want to print.
- You can also choose “Clear Print Area” if you want to remove the print area.
1.4 Step 4: Preview Your Chart.
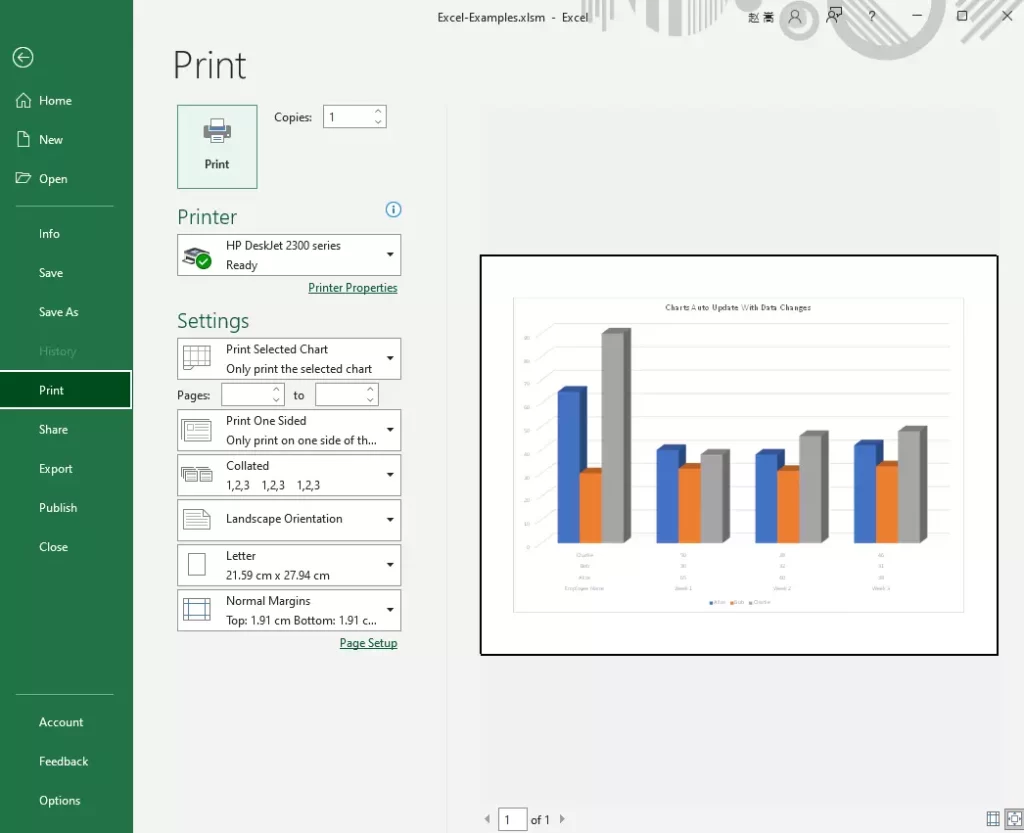
- Before printing, it’s a good idea to preview your chart to see how it will look on paper.
- Go to the “File” tab and select “Print”.
- Here, you can choose the printer that you want to use and adjust the print settings such as number of copies, page orientation, and page range.
- If you select the chart only in section 1.3, then it will show the chart printing preview on the excel right side.
- And the Settings drop down list will select the item Print Selected Chart by default.
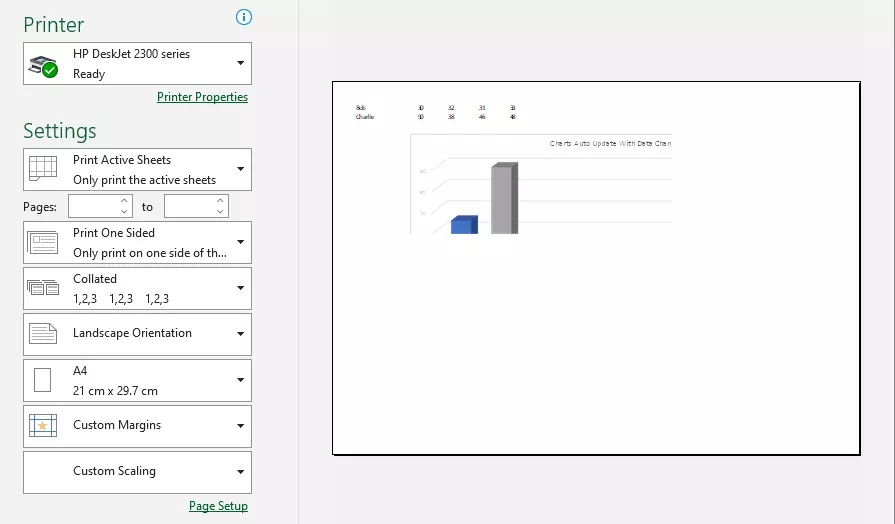
- If you select the specified area to print in section 1.3, then it will select the Print Active Sheets item in the Settings drop down list and the printing preview will only show the content in the specified area.
1.5 Step 5: Print Your Chart.
- Once you’re satisfied with the preview, you can print your chart by clicking on “Print”.
- Make sure that your printer is connected and turned on, and that you have enough paper and ink.
- After printing, you can review your chart and make any necessary adjustments.
2. Conclusion.
- Printing charts in Excel can be a bit tricky, but by following these simple steps, you can print your chart full page without losing any data or quality.
- The key is to adjust the size of your chart to match the size of the paper that you will be using for printing, set the print area, and preview your chart before printing.
- With these tips, you can create professional-looking charts that are easy to read and understand.